By: Erica Quam, Certified Iyengar Yoga Instructor and Superfeet Wellness Panel Member. Erica Quam has taught yoga to athletes and active individuals for more than 11 years and is co-owner of Prime Sports Institute. Erica first began teaching to her athletes during her 15-year career as a college swim coach. She believes yoga can help prevent injuries and reduce stress, while building strength, flexibility and confidence.
Do you love to hike and are looking for simple ways to stay healthy, reduce stress on your body and prevent injury? Try adding these restorative yoga poses into your weekly routine.
Supta Padangusthasana - Reclining Hand to the Big Toe pose
This pose is often thought of as “just a hamstring stretch” and really it’s so much more! It’s more like three-poses-in-one on each side.
Getting in
Hold onto your right big toe with two fingers of your right hand or use a yoga strap around the arch of your right foot. Extend your right leg up. If your hamstrings are a little tight, try sliding your hands down the strap until you can straighten your knee completely while relaxing your outer shoulders down towards the floor. Your left leg can stay fully extended with the heel on the floor. For greater stability, keep your left leg active and press your left foot into a wall.
Going further
- Bring the right foot up towards your right shoulder, rotate your right leg out, and lower your right leg out to the side and down towards the floor only as far as you can keep your left side totally grounded.
- Switch the strap into your left hand or take hold of your right big toe with your left hand. Keep your left leg fully extended and begin to take your right foot across and over towards the left inch by inch. You can rotate your left foot over onto its side, and take the right leg further across. For the full twist, extend your right arm out to the side keeping your right hand in line with your right shoulder and rotate your head to look towards the right.
In the pose
To emphasize recovery, once you get your body into the shape of the pose, allow your focus to be on a long, smooth exhalation. Let your abdomen be soft and relaxed. Try holding the pose for 5, 10, or even 20 breaths in each shape, on each side.
Benefits of this yoga pose for hikers
Stretch your hips, hamstrings, calves and relieve an achy lower back. This sequence can calm and soothe your nervous system as well as aid in digestion by using diaphragmatic breathing and working towards relaxation.
Ahdo Mukha Svanasana - Downward facing dog pose
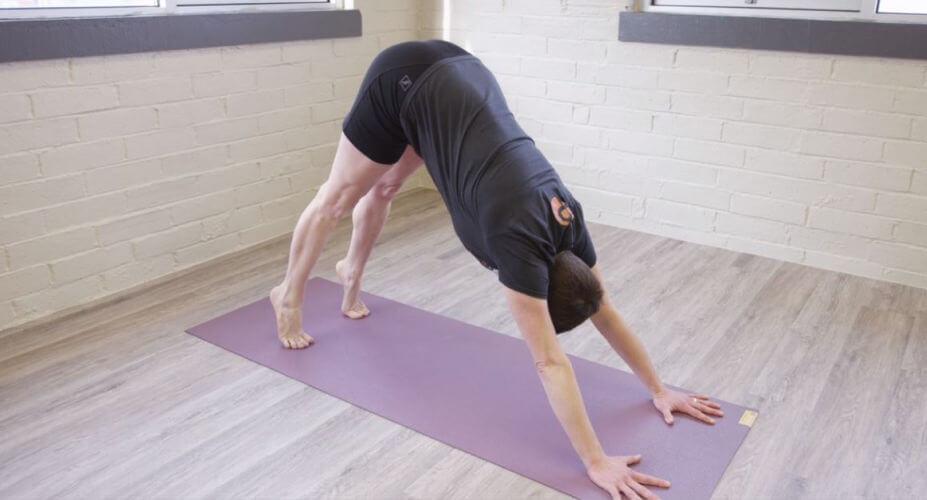
Downward facing dog pose is a great full body stretch to help you recover after a hike. Since it’s an inversion, it’s a pose that can help calm your mind and re-energize your body.
Getting in
From child’s pose, extend your arms forward until your elbows are straight. Keeping your hands there, lift your hips, straighten your arms and legs, and adjust so that your hands and feet are shoulder width apart.
Benefits of this yoga pose for hikers
Stretch out the entire back fascial line of your body — from the back of your neck, the muscles on the along your spine, to your hamstrings and calves. Let everything lengthen with each exhalation. For a more restorative focus, try having a bolster or several blankets in position to allow the crown of your head to rest on the support and stay for 10 to 20 breaths.
Viparita Karani - Legs up the wall pose
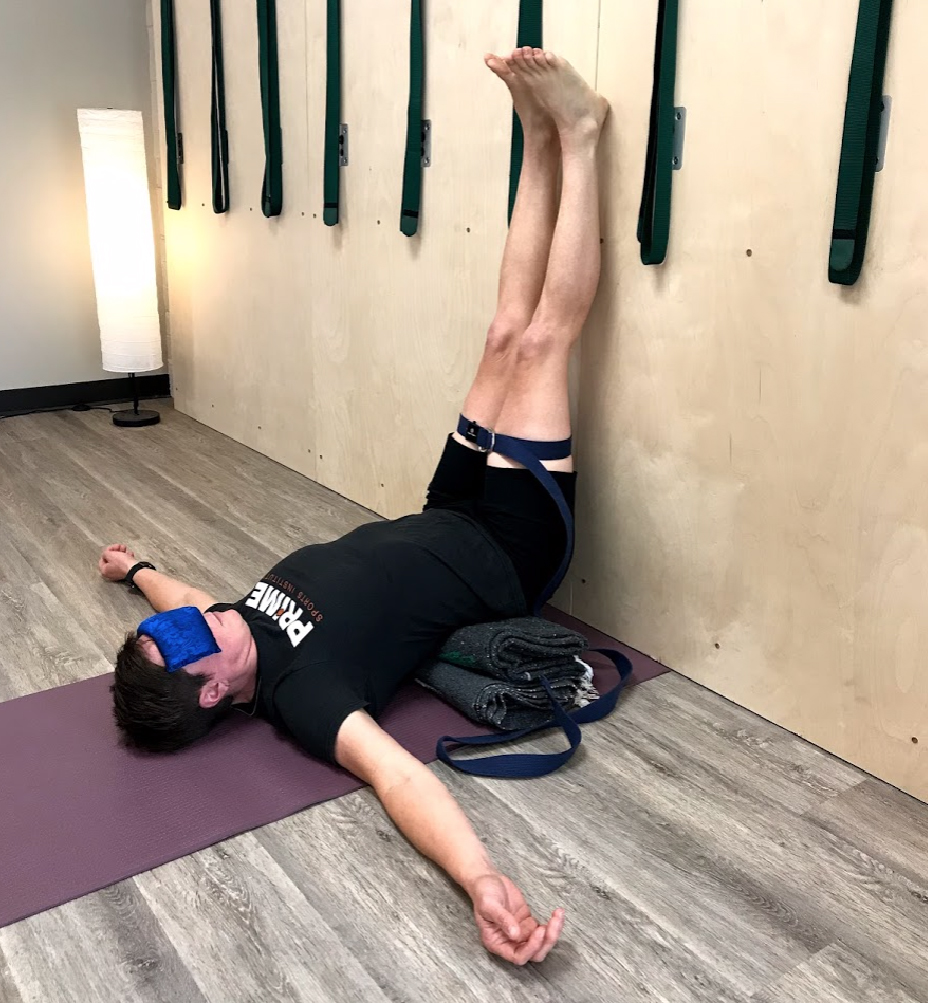

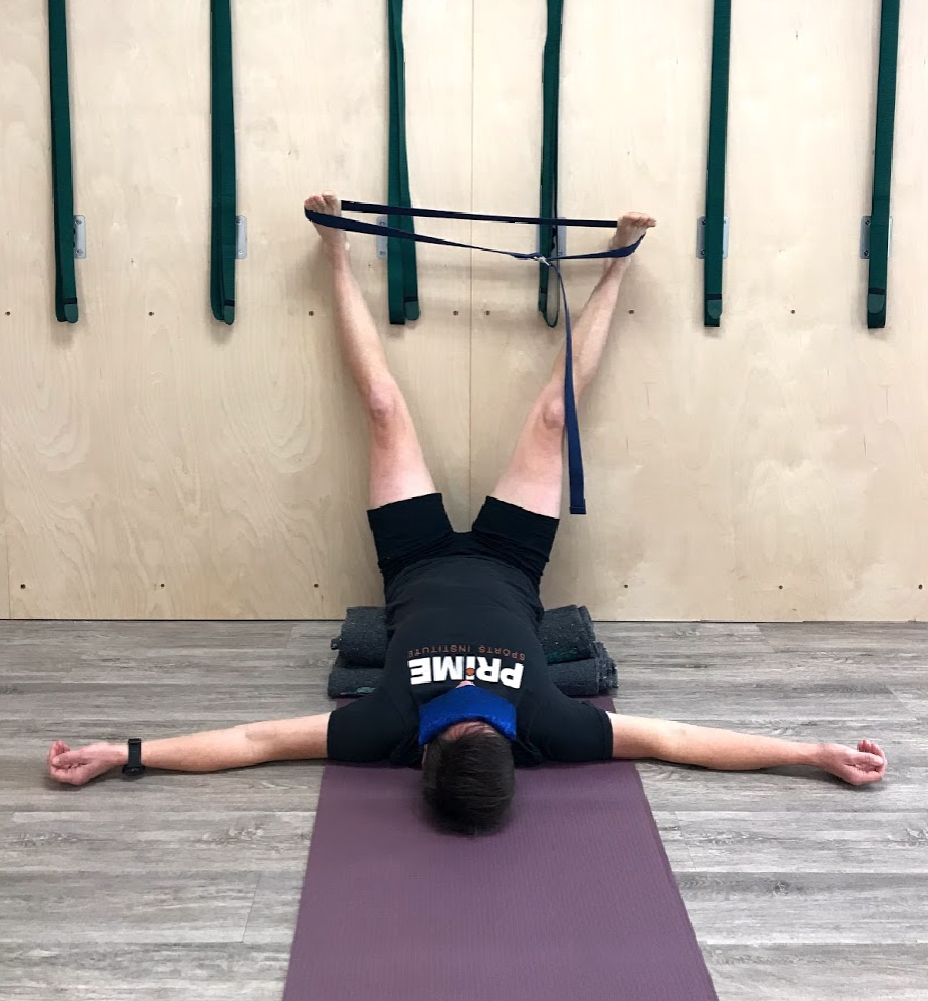

Legs up the wall is a powerful restorative pose to try for 5 to 10 minutes after a long hike to allow blood to flow back into your core, reduce swelling in your feet and soreness in your legs.
Getting in
Sit with your hip a few inches away from the wall and then rotate onto your back taking both legs up the wall. Your sit bones do not have to touch the wall - you can be a few inches away. If your hamstrings are a little tight, try having your feet a little more than hip width apart. If your hamstrings are more loose, you can try using a strap around both of your thighs, halfway between your knees and hips. Extend your arms out to the side with your hands in line with your shoulders.
Benefits of this yoga pose for hikers
Try using a couple of blankets to elevate your hips and allow your tailbone to move down towards the floor so your back is slightly arched. This increases the therapeutic benefits of the pose. Cover your eyes with an eyebag for a deluxe restorative experience.
Anjaneyasana - True Psoas Stretch
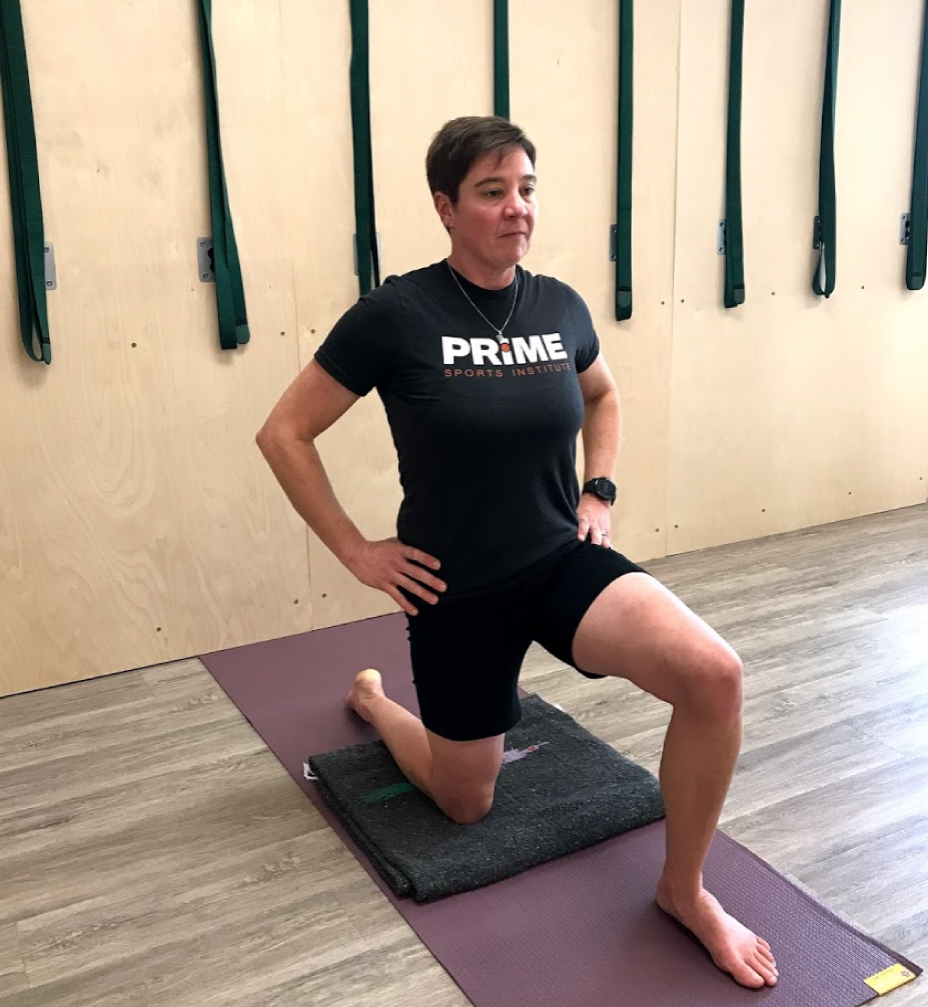

When you hike, more demands may be placed on your hip flexors - especially when the trails are steep!
Getting in
Bring your right leg forward into a lunge. Your left knee will stay on the floor. Adjust so that your right knee is over your heel and the center of your knee stays aligned with the center of your foot. Keep bringing your right heel back until your spine can be extended vertically. Move your sit bones down, tuck your tailbone in, and lift your lower belly up. Your back should not be arched. Deepen the stretch on the left psoas by extending your left arm straight up or side bend slightly over to your right.
Benefits of this yoga pose for hikers
This one simple posture can be key to relieving lower back pain you may experience after a long day on the trail.
Sucirandhrasana - The window stretch
Loosen up your hips and lower back after hiking by doing the window stretch at the wall.
Getting in
Lie on the floor with both knees bent and both feet on the wall. Cross your left ankle over your right knee and flex your left foot. Gently press your left knee away to deepen the stretch. If you’re feeling super tight, move further away from the wall.
Going further
To deepen the stretch you can feed your left hand through the window and interlace your fingers together either below your right knee around your chin or behind the knee around your thigh. You can also hold onto a strap instead if you have to lift your head to keep the clasp. Let your right foot come away from the wall, continue to move your left knee away, and bring your right knee closer in towards your chest.
Benefits of this yoga pose for hikers
This pose stretches the muscles of your hips and can help loosen a tight lower back. Be sure to keep your head, neck, shoulders, and hips relaxed on the floor. Stay for 1 to 2 minutes on each side allowing your muscles to relax.
Gomukhasana variation - Shoulder Stretch
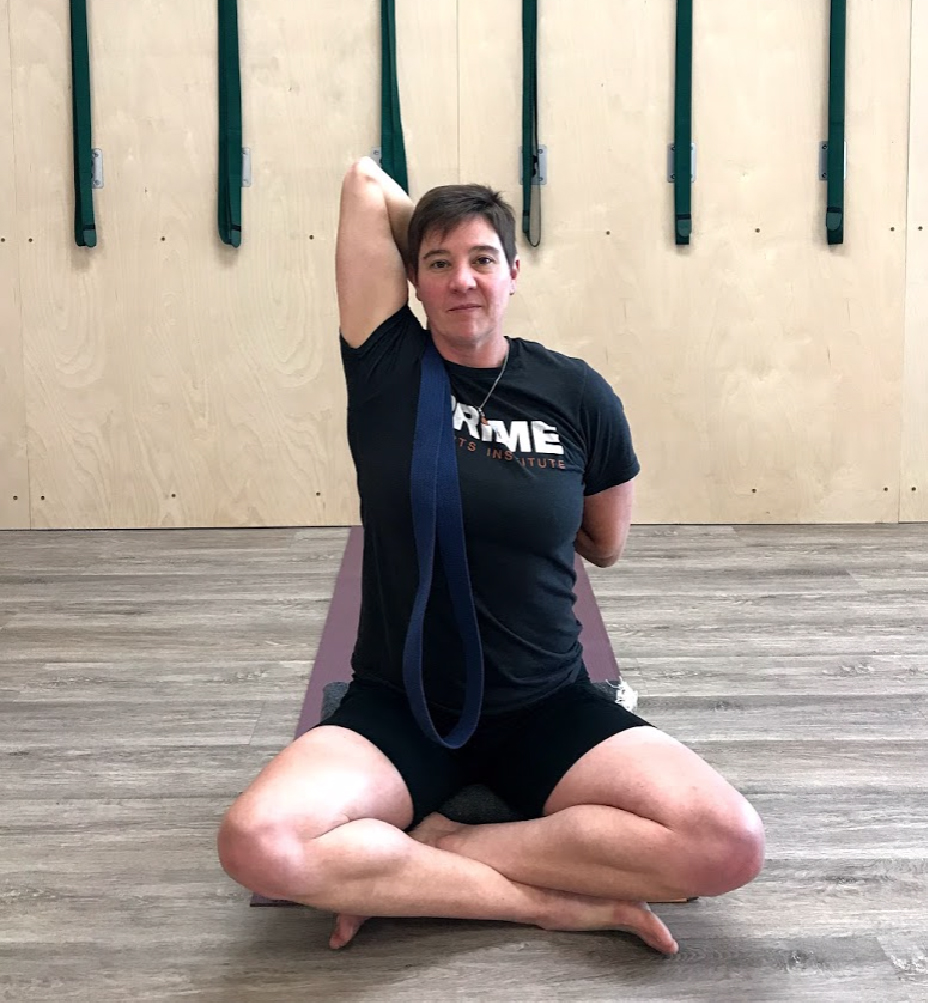

Although hiking may focus more on your lower body, your shoulders and postural muscles can also get fatigued - especially if you’re carrying a pack with weight.
Getting in
Extend your right arm up, turn your palm away, and bend your elbow placing your right hand as far down your back as you can reach. Take your left arm out to the side, turn the thumb side of your hand down towards the floor, bend your elbow and reach for your right hand. If you cannot reach your fingertips, try holding onto a strap or a towel and walk your hands as close together as you can.
Hold on each side for 5 to 10 breaths. Allow your eyes, neck, and throat to relax as much as possible as you stretch your elbows away from one another.
Benefits of this yoga pose for hikers
This pose will help stretch your shoulders, lats, and upper back. Open up your chest to counteract the effects of carrying a backpack. Move your shoulders through internal and external rotation helping with blood flow and circulation to these joints.


